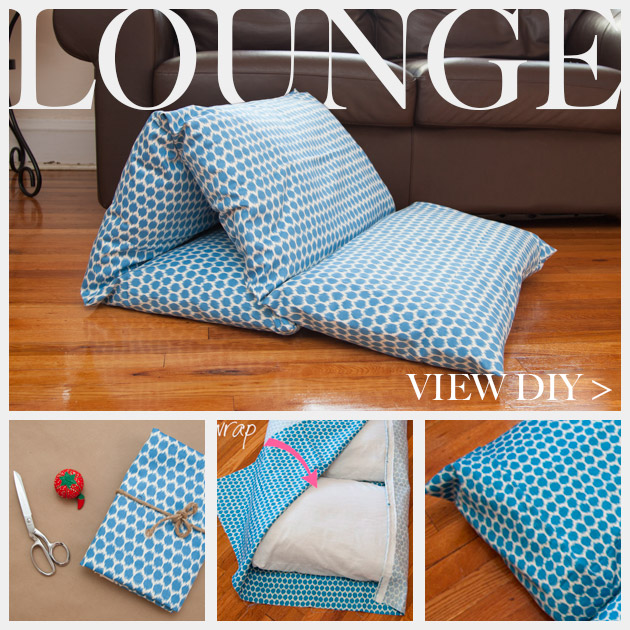
To celebrate Waverly Fabrics 90th anniversary, they sent me this beautiful fabric which I turned into a super comfy DIY Pillow Lounger. Check out the DIY tutorial and more information on their Facebook contest!
GET READY TO LOUNGE >
In honor of national sewing month, Waverly and Jo-Anns Fabrics are having a Waverize it! contest. Scroll down to the bottom of the post to find out more and enter to win!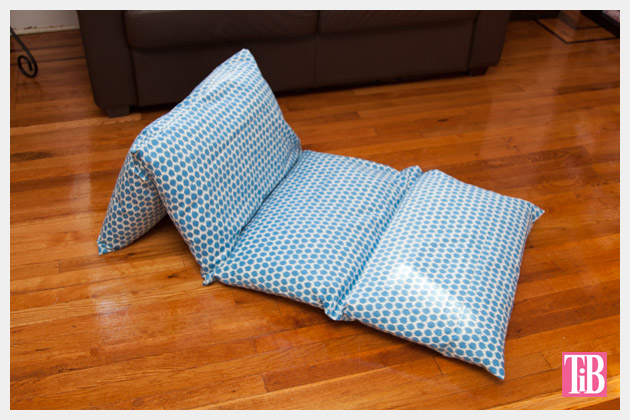
TOOLS & MATERIALS:
- 2 + yards of 56-60 inch wide fabric (Mine is c/o Waverly)
- Pillows 4 (or 5 is you use more than 2 yards of fabric)
- Pins
- Scissors
- Sewing Machine
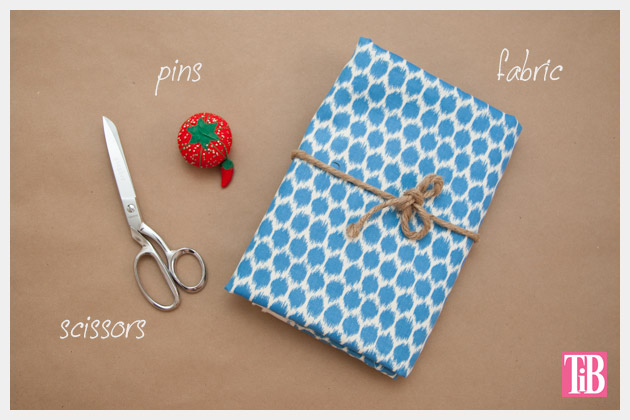
It helps if you have a big space to work on this, I used my livingroom floor.
step 1
Layout your fabric on a large flat surface.
Put your pillows on top to measure.
I had just over 2 yards of fabric for this project (c/o waverly) so mine worked best with 4 pillows.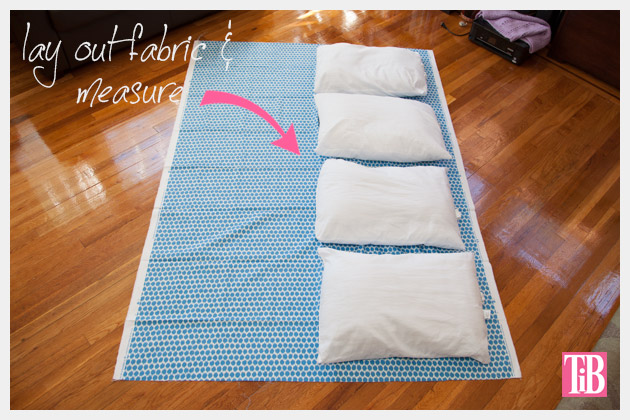
step 2
Wrap your fabric around your pillows and pin your ends, with this right sides facing each other.
TIP: Let your fabric fold over itself on the back side. This will make an envelope fold that will help keep your pillows inside.
step 3
Using your sewing machine sew your two end seams.
Trim off any extra fabric.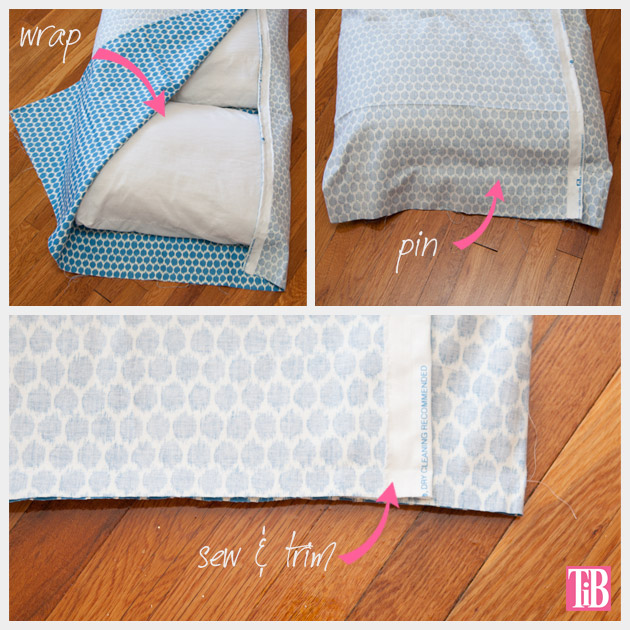
step 4
Turn your fabric right side out.
Lay it out on a flat surface and measure for your pillow pockets.
Measure your fabric and your pillows and make equal sections for your pillows.
Pin your sections and use your sewing machine to sew your seams on the outside of your pillow case.
Trim off extra threads.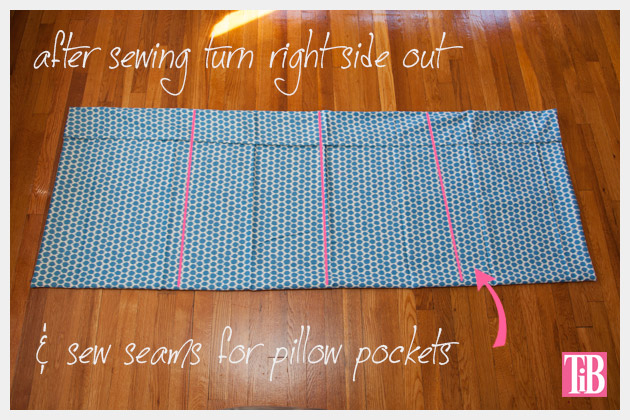
Slide your pillows into each of the compartments, they should fit a bit snug.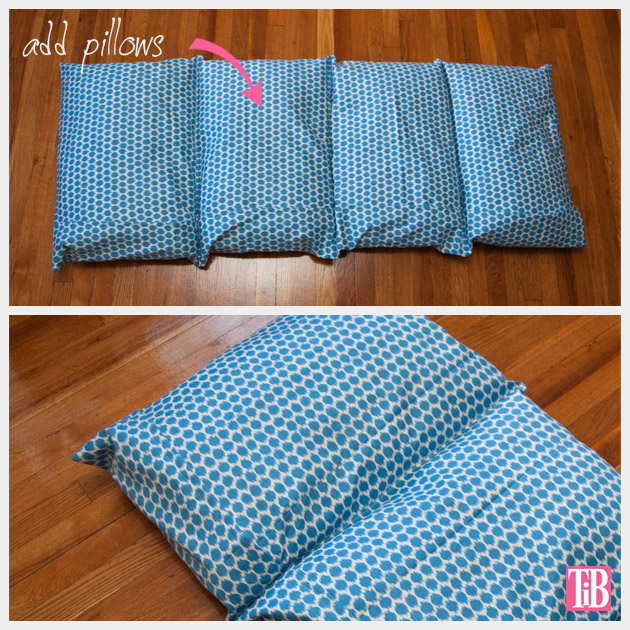
While this isn’t my typical type of post, this fabric from Waverly was just perfect for a pillow lounger. We just recently (this past weekend) moved and now we have a bigger living room. (After living in Brooklyn, anything is bigger!) And we’re trying to keep the living room as open as possible, so a lounger like this is perfect for my daughter, who’d rather be laying on the floor anyway. I saw this idea on Pinterest a long time ago and had been wanting to make one, it’s just such a great idea.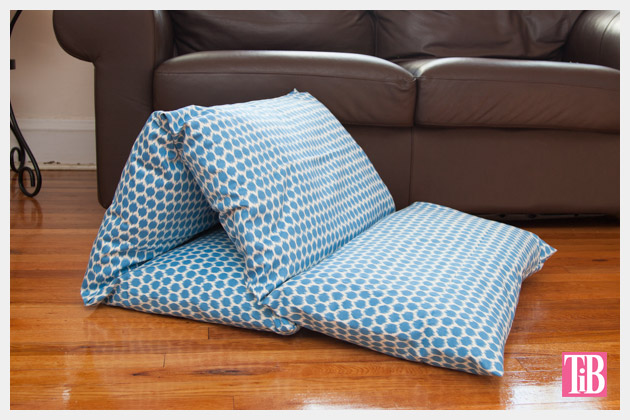
Leave me a comment and let me know what you make!
This is a sponsored post, I have been compensated for this post. However, all opinions, design and tutorial are my own.

wow!! I love your blog …….awesome work
http://daybydaycreation.blogspot.com
Thank you so much Garima!
xoxo
Cathy
This is fantastic! And you made it look so easy. I planned on making 2 for the kiddos for a long time, now I’m going to do it for sure, thanks!
I’d love you to share it on The Crafeteria’s Pinterest Group Board
Thanks Tal!
This was easier than I thought too and we use it all the time now! ;)
I will definitely check out your board on Pinterest! Thanks!
xoxo
Cathy
Thank you so much for this super easy tutorial! I can’t wait to try this! Found you on Craft Gossip.
Madalyn @ HomeHearted
Thanks Madalyn!
I’m so glad you found me!
xoxo
Cathy
I love this video and I made one. I love it. I want to make more
Plz make more videos… huggs
What a simple, easy, functional piece! I am going to get some pillows today make one for my family room today.
Thanks Sally!
I’m so happy this project inspired you!
xoxo
Cathy
Not sure how to make the flap to fold over the pillow. If possible could email me. I have 11 grandchildren and I want to make one for each for Christmas. Thank you so much in advance.
Came across your site through Pinterest and really love it….thank you so much for this wonderful idea on the pillow lounger. I am remodeling my RV and this was the perfect idea for the bench seats and so easy & affordable. Hope to get more great ideas from you—-thanks again. New follower.
I really liked. Look confortable
I made these for my three granddaughters and they love them. I used non pilling fleece material. If I could get down on the floor with them I would make one for myself. They look so cozy laying on them. They do family movie nights and just love them..
Do you have fabric measurement as I also want to use fleece was thinking 5 pillows, how many did you use.
I adore your ideias, are simple and beautifull.
Sou uma artesã gosto de novidades. ..
I use the store all the time. I too am going to make this lounger. Have purchased the mTerial already
I love this idea! But how do you wash it? Do you leave one end open?
Hi Sarah,
It’s folded over like an envelope and that’s where you can slide the pillows in and out. I take the pillows out when I wash it.
xoxo
Cathy
I followed and understood everything until where you say “sew seams for pillow pockets” I don’t see where you made the opening to stuff pillows. I’m sorry but I’m confused can you please clarify. I love what you’ve done and would like to make one for myself
Love your pillow lounger such an awesome idea looking fad to do this for my grandchildren.
I also do not see how to stuff the pillows in or take them out to wash?
Hi Loralee,
If you look at step 3 you can see where the fabric is folded before sewing. When you sew the casings for the pillows you’re only sewing seams between where the pillows go and on the ends of the pillow lounger. This leaves an envelope type of fold where you insert or remove the pillows. I hope this helps. Please let me know if you have any other questions.
xoxo
Cathy
Magnifique
I love this pillow lounger. I have 5 great grandchildren and I plan to make one for each of them for Christmas. Thank you for sharing.
In other words you sew the ends and the pillow seams but leave the side open? Is this right? Won’t the pillows fall out?
Hi Bonnie,
The pillows don’t fall out because there is an overlapping fold. In step 3 you can see how the fabric is folded over itself putting the opening on the back and not the edge of the lounger, this makes the opening harder to see but keeps the pillows from falling out. If you look at steps 3 and 4 you can see the fold about 5 inches in from the side.
I hope this helps.
Cathy
I’ve made my own versions using your method and they work really well. I have used upholstery fabric which gives the bed a lot more structure and hardwiring. I would also tell people that it is important to follow your instruction and put the little bit over first and not the long part of the fold as it looks a bit messy having the longer section on top. I got a bit over confident and forgot to follow your instruction regarding this and had a lot of unpicking to do.
Hi! Love it, i’ve got one question… If you want to wash , how do you do??? Hood luck… Love your blog
I wanted to make this for my 6 grand kids so I went and got 2.5 yards and 4 pillows laid everything out and I didn’t have enough material. So I go back and get 2.5 yards by 60 inches and get home and lay it out again and still wasn’t wide enough. So I don’t know what in the world I’m doing wrong but I got the Waverly material and it said 60×60.
Turned out great. I didn’t have wide enough fabric so I seamed some flannel and the seam just went down the left side of the pillow. Everything else was the same as your tutorial. Thanks!
Do you have fabric measurement as I also want to use fleece was thinking 5 pillows, how many did you use.
Am making two of these for my great niece and nephew for their birthdays. Have all the ingredients ready to go. Have just one question that I’m hoping you could answer before I begin. Was wondering how much space you allowed between each pillow to center the sewing line on? Hope that makes sense. Thank you….
Wow… Great work! This pillow seems easy to make by following your steps. I will definitely make this pillow. Thanks for sharing.
I made this yesterday and I made each pocket 19 inches wide…the width of a standard pillow case…the pockets are too wide. Next one. I will measure the circumference of the pillow and make the pocket 1/2 the circumferemce for a more snug fit. I french seamed the ends…and of course didn’t think about the envelope flap so It ended up on the outside so I had to rip it and refold the flap to the in side. The next one will be a breeze! thanks for the idea!
I realize this is an older post, so I hope you’re still seeing comments/questions on it. Where did you find the extra wide fabric? I can only find 44″. Thanks!
How do you wash this did you leave one side open so you can slide the pillows in and out im going to use sheets for this i got the sheets on sale spent 2 dollars on kid sheets cant wait to make this thank you what a fun gift it will mak
I need to make six of these for a friend. I need a video of you or someone making these.please. Am on Facebook Isolde ward. Please look me up and send video. Or email me at wardissie7@gmail.com
My daughter has scoliosis and has to wear a brace 16-18 hours a day. I’m going to make this so she can have it at school when she has to lay down to put her brace back on. Thank you!
Hello! I love your simple design! :) Just a question: what are the size of the pillows you’re using and the width of the fabric? I can’t decide if my pillows are too large or my fabric too narrow. Thank you so much!