Its time to get crazy with our accessories and add some color.
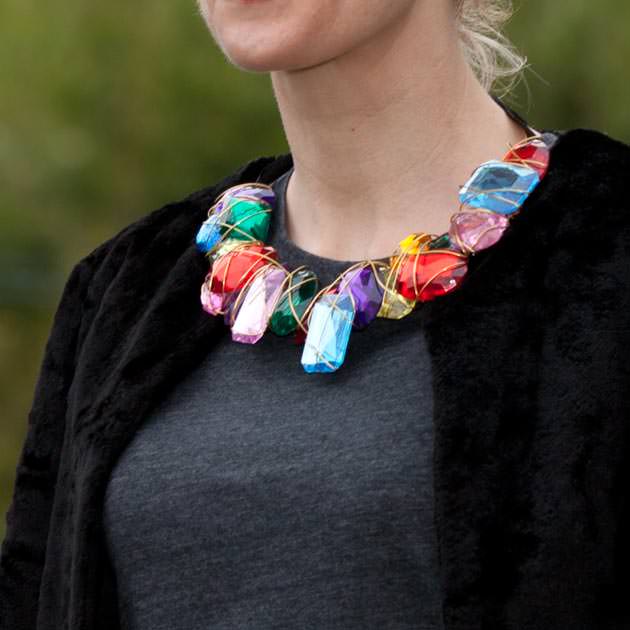
This DIY wire wrapped stone necklace with large stones is a great way to do just that. Even though my photo doesnt show it well (because were still freezing here in Seattle! This weather is ridiculous, I cant believe its June!), this really is a great necklace for Spring or Summer.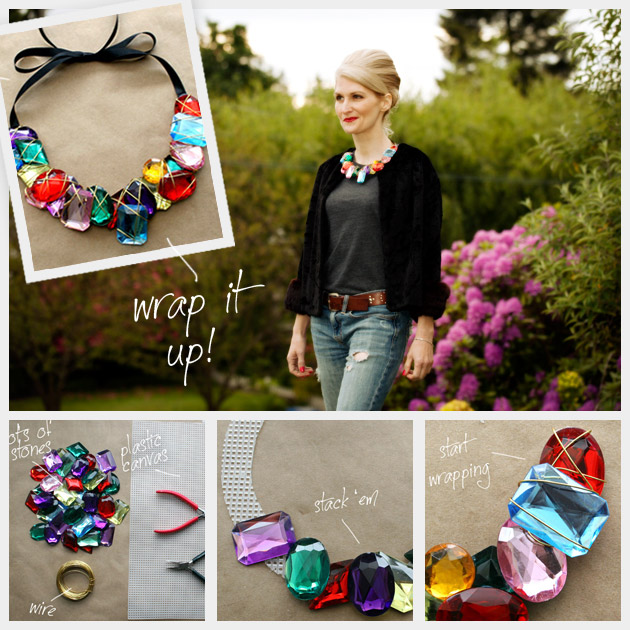
This necklace would make a great statement with a strapless dress or tank.
VIEW DETAILED INSTRUCTIONS >
To see step by step instructions and photos click here.
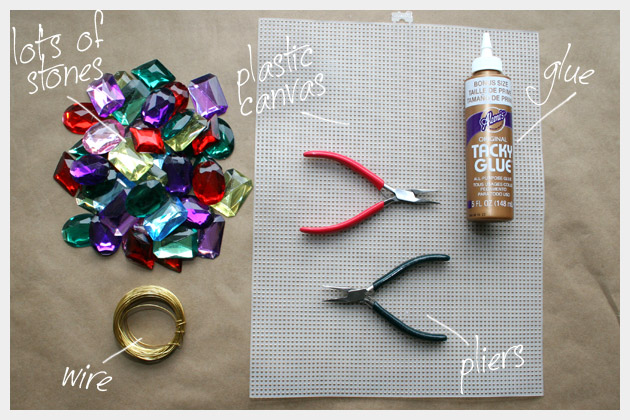
Supplies to make your Wire Wrapped Stone Necklace:
- 1 Bag of large plastic jewel stones (I found mine at Michael’s)
- 1 Sheet of plastic canvas (found mine at Joann’s Fabrics)
- 1 Yard of ribbon (local fabric store)
- 20 gauge wire (Joann’s)
- Pliers
- Scissors
- Glue (I ended up using hot glue, because I didnt want to wait for the glue to dry)
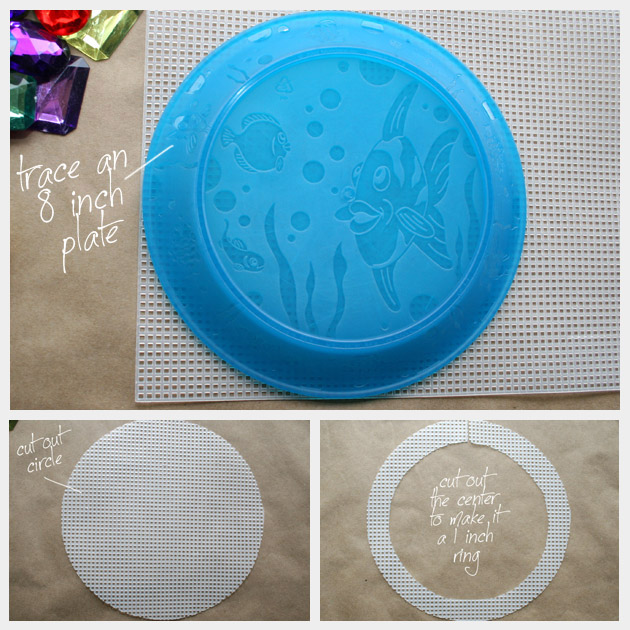
Step 1
- Take your plastic canvas and an 8 inch plate.
- Trace around the plate and cut out.
- Cut inside your cut out circle to make a 1 inch thick ring.
Step 2
Start glueing your stones to your plastic canvas. Mix up your colors and shapes. Keep adding until its all filled up.
Do not fill up your whole circle. I recommend only going up about half way, other wise it gets too stiff and you wont be able to put it around your neck.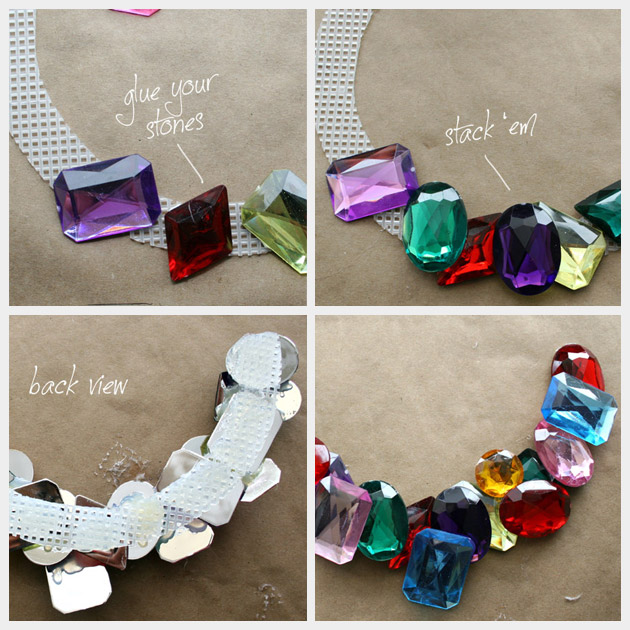
Step 3
- Once youve finished glueing on all your stones, you can start wrapping your wire.
- Start on the back side and tuck the end of your wire into your plastic canvas and crimp to hold.
- Keep wrapping until youve wrapped the whole thing.
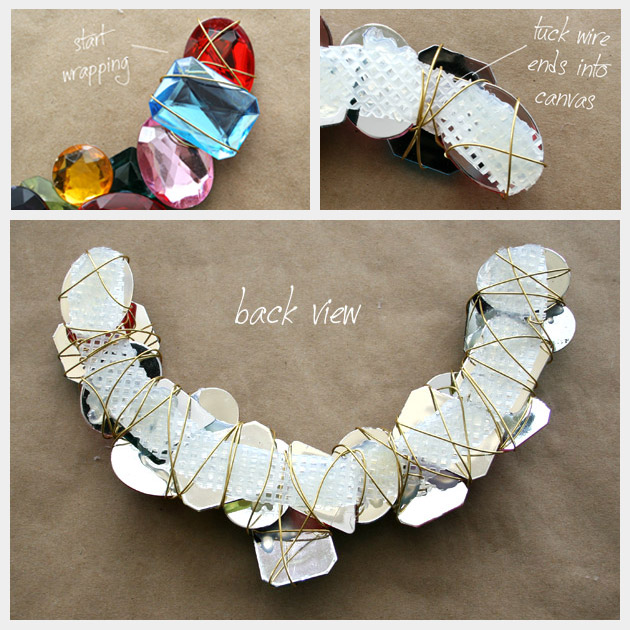
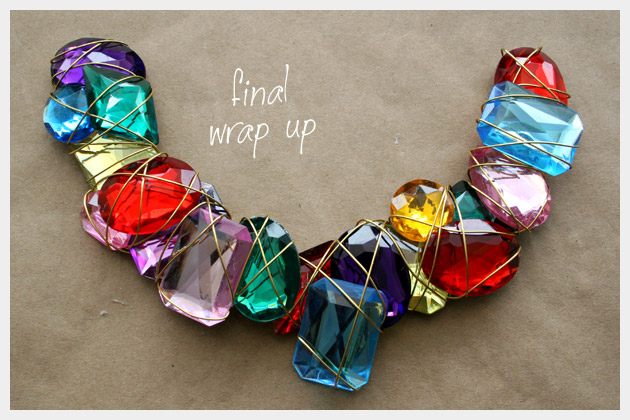
Step 4
Take your ribbon and cut it in half.
Glue one end of each piece onto the back of your finished jeweled and wrapped necklace. I tucked my ribbon under the wire on the back side before I glued it.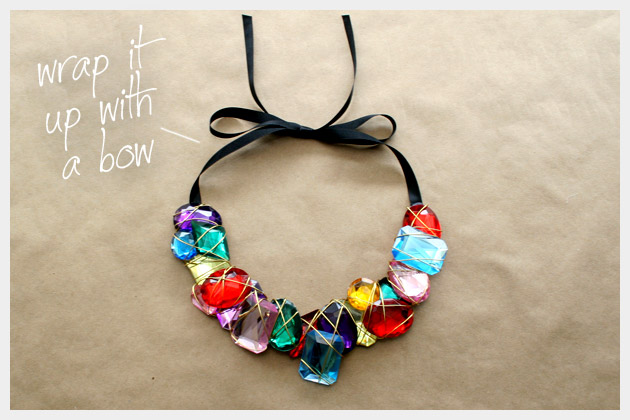
This was a really quick and fun necklace to make. The hot glue worked really well and Im sure, if youre more patient than me, most other types of glue would work just fine too (including Aleenes Tacky Glue, as seen in the supplies picture).
This really is a cute necklace for Summer, I cant believe how chilly and fall like my picture turned out, but here in Seattle we havent had sun for a while. Im doing my best, if we get some sun soon Ill retake a more seasonally appropriate picture.
Let me know if you have any questions and let me know how yours turn out.

I love this! It looks so easy. I think I can make this with everything I already have!
http://thefeministajournals.blogspot.ca/
Absolutely LOVE this! Brilliant.
Thank you so much Grace!
xoxo
Cathy
Looks awesome. Love the big and bright stones.
Thanks!
xoxo
Cathy
This is gorgeous, Cathy! Put multicolored gems in a jewelry project, and I’m sold :)
If you’re interested, I’d love to link to this project on our site, AllFreeBeadedJewelry.com, directing readers back to your tutorial. They love wire-wrapping tutorials, and I think they’d adore this project! Let me know what you think!
Thanks for sharing!
Kelly Spence
Editor, AllFreeBeadedJewelry.com
Thank you so much Kelly!
It was so much fun to make.
Absolutely, I’d love to have you link this project to your site.
Thank you for asking!
Xoxo
Cathy
Cathy loved the necklace
But that’s not why I’m writing. You look fantastic with your hair up. I hope that is you in the photo! Keep it up girl you look amazing.
Hi Liz,
Thank you so much for the complements. Yes, it is me in the photos. You really made my morning. Thanks! :)
xoxo
Cathy
Absolutely stunning! The bib style with easy wire wrapping is a super combination! Pearl
Hi Pearl,
Thank you so much!
xoxo
Cathy
Really lovely and creative!
Love this necklace… just added it to my DIY project board on Pinterest
xx
Here&Now
Hello Cathy!
Just came across your website today and I’m in love with every project I’ve seen so far!
Do you think this project could be variated using beach glass instead of plastic gems? I have boxes full of beach glass and could see some beautiful possibilities with this tutorial!
-Katie
Hi Katie,
Thank you so much!
I love beach glass and I think that could be a gorgeous necklace. My only concern would be the weight, it might get a little heavy. But if your pieces are smaller and you are careful how many you use, I think it could be really beautiful.
Let me know how it turns out! Send me a picture.
xoxo
Cathy
Is the plastic canvas/wire uncomfortable on the skin?
Hi Julie,
Just make sure when you cut your plastic canvas that you leave the edges smooth and make sure you tuck in all your wire ends really well.
I personally don’t find it uncomfortable.
xoxo
Cathy
I LOVE this DIY as well as all of your others! But, I can’t find those stones at Michael’s… What brand is it? Thanks!
Hi Hannah,
The brand is Darice, they are plastic “gems”. I found them in the section at Michael’s that had all the things for kids projects. The package I bought was a 1 pound value pack.
Good luck! ;)
xoxo
Cathy
Wow, this is such a great DIY! Definitely so cute and fun for the summer.
WOW you’re really talented! I loved your blog and all of your DIY’s, you have a new fan and follower now :D
xoxo Julieta
http://www.vjuliet.com
I just happened to find this site by accident, and I am so glad that I did. I am new to the DIY and can’t wait to get startted. This is going to be my first project…..
Whoa. Whoa. Whoa. This is…I don’t even know. Just whoa. I can’t talk. My sparkle tooth just kicked into overdrive. I want ten of them. I have 18 peanut butter jars of rhinestones with THIS NECKLACE written all over it.
Very pretty and looks easy will try very soon
Hey Cathy,
Love this necklace and I decided to give it a shot for a formal I have next week. I’m stuck on the wire wrapping though, I can’t seem to wrap the wire tightly. Any tips or tricks?
Thanks, Emma
Hi Emma,
You can try pushing the wire and bending it around the contours of the big stones. You can also use pliers and crimp it on the back side or edges to help it to hold. If that’s still not working, you can try using shorter lengths of wire and attaching them on the back side, you’ll still have the same look on the front but you’ll just need to secure the wire ends on the back so they don’t catch on anything.
I hope this helps.
xoxo
Cathy
Hi Cathy!
I’m a fellow DIYer/ blogger and I’m obsessed with this project! I wanted to ask you if it was okay that I share this project with my ladies at the next Craft night? You are very talented!
Hi Cathy, this is so good. I am a diy project lover. Got to try this wire wrapped necklace next time.