Give yourself a big kiss! This DIY Printed Make Up Bag is a great way to carry all your essentials and if youre like me, you can always use a new bag!
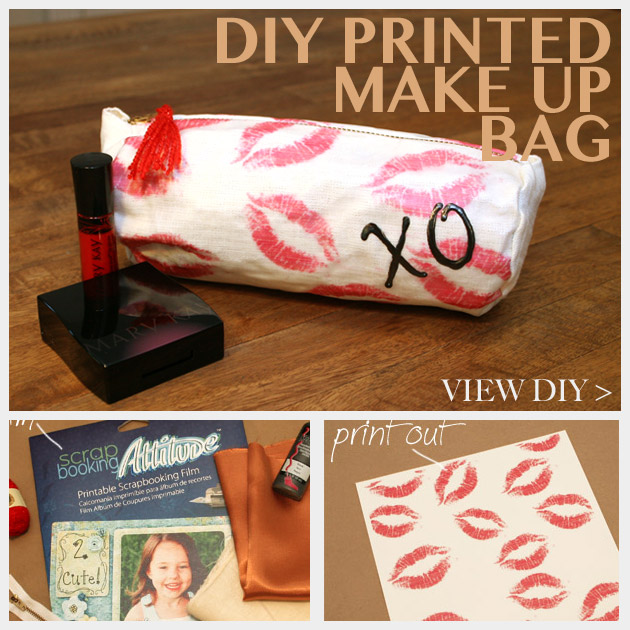
In this post Im trying out a new product, Scrapbooking Attitude printable scrapbooking film. Its a simple and easy way to print on fabric, wood, paper, almost any surface you can think of.
VIEW STEP BY STEP INSTRUCTIONS >
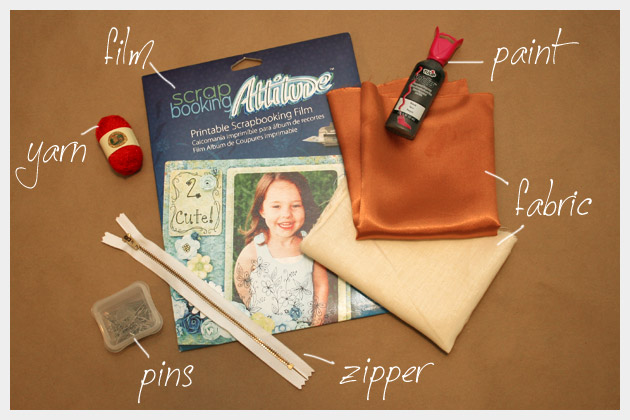
Supplies to make your DIY Printed Make Up Bag:
- Scrapbooking Attitude printable scrapbooking film
- Inkjet printer
- Download Lips image here (increase the image by 25% before printing) or design your own
- Neutral fabric for outer bag
- Satin lining fabric for lining
- Zipper
- Tulip Metallics Dimensional Fabric Paint
- Sewing machine
- Glue stick
- Iron
step 1
Download the lips image here or design your own image and print it out on your inkjet printer.
Make sure you increase the size by 25% before you print.
Each half is a mirror image of the other, one for each side of your make up bag. This way you can make a barrel style bag like mine or cut it in half and make a rectangular flat bag, if you prefer. (I recommend making a flat bag, the ends were a little tricky.)
step 2
Take your neutral fabric for the outside of your bag and lay it flat on a hard surface.
I recommend using a glue stick on the film to help it stick to your fabric.
Rub the glue stick over your printed image on the glossy side, be sure to avoid any large clumps.
Make sure your entire image is covered with glue. This is very important.
Place image side down on your fabric.
Smooth out your image, making sure there are no air bubbles or bumps.
Remove the paper backing.
Cover with a thin cloth.
With your preheated iron on a medium setting, carefully iron over your image.
Do NOT use steam.
When you are done, your film will have laminated itself to your fabric.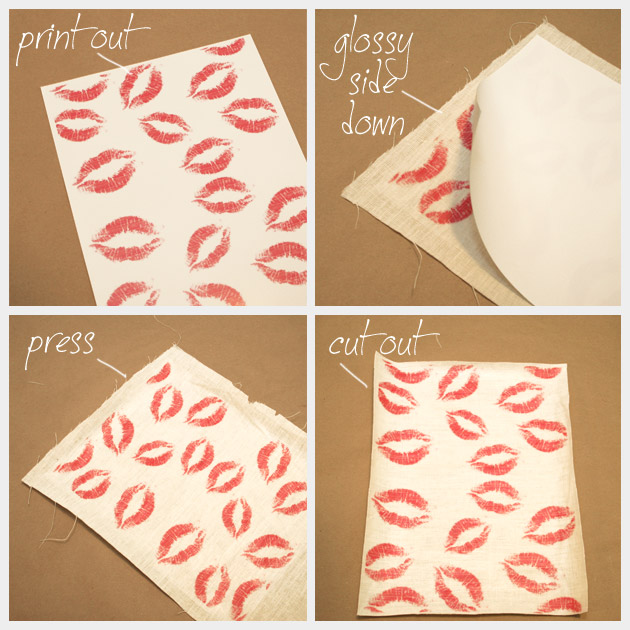
step 3
Take your fabrics, both your lining and your now printed outer fabric and cut them to the size you want for your make up bag. I cut mine 8.5 by 11, the size of the laminate.
Cut out two circles in each fabric for your ends. My circles are 3.5 inches in diameter.
step 4
Once your fabric is cut, youll want to add your zipper.
Sew both your lining and outer fabric together to each side of your zipper, with your fabric facing the wrong way.
Turn it right side out and press.
After your press your fabric, sew an external seam very close to the edge on your lining fabric, to help keep your fabric flat and keep it from getting caught in your zipper.
Do this for both sides of your bag.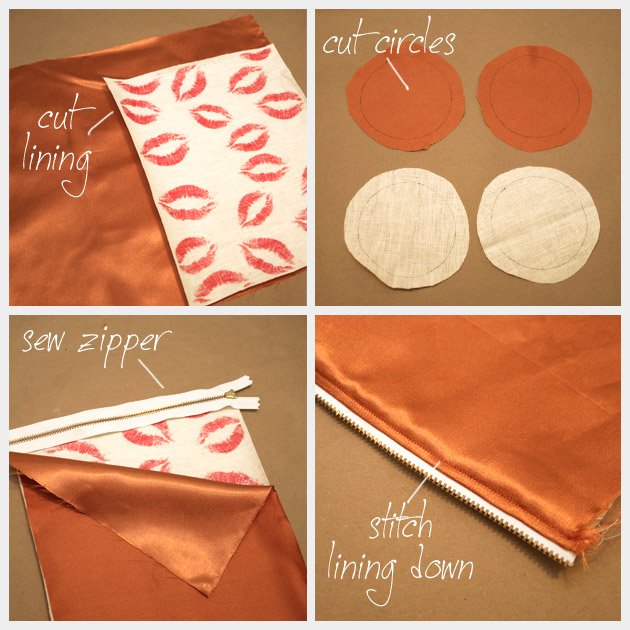
step 5
Unzip your zipper, at least half way and turn your bag inside out.
Pin and sew your linings together.
Then pin and sew your outer fabrics together.
Turn right side out through your zipper.
step 6
Using your yarn, wrap it around your fingers a few times to make a tassel.
Cut one end of your looped yarn.
Thread your yarn through the hole in the end of your zipper.
Fold your yarn over and wrap the folded end of your yarn, just under the zipper head, with another piece of yarn.
When you have wrapped around it about 4 or 5 times, tie a know and thread your ends through your wrapping.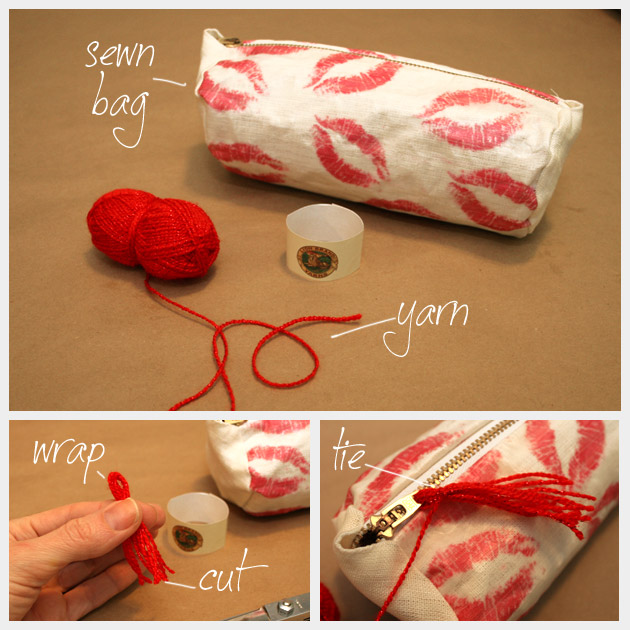
step 7
Take your dimensional fabric paint and draw a large “XO†in the bottom right corner of your bag.
Let your paint dry.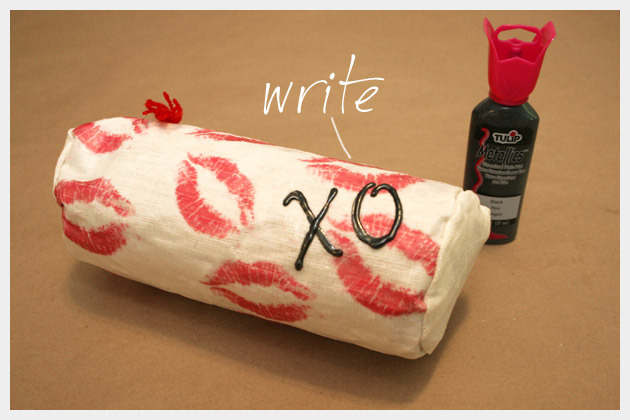
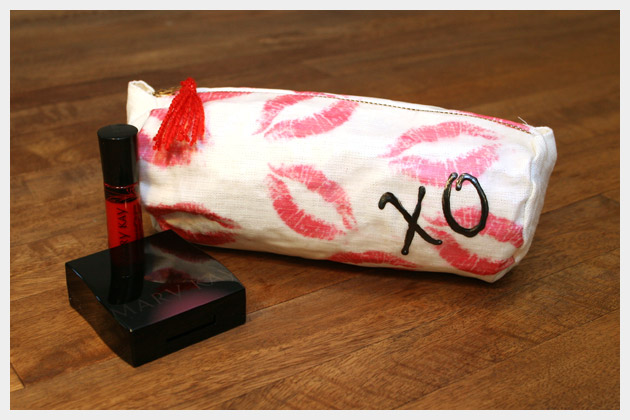
We all need to love ourselves, so give yourself a big kiss with this fun make up bag. This bag is a great size to throw in your purse and take with you.
This laminate film from Scrapbooking Attitude is a simple way to laminate fabric or to add images to most any project. When the film adheres to your material it really allows you to see your textured surface underneath.
For more information on the film that I used in this tutorial check out Scrapbooking Attitude.
Social Media for Scrapbooking Attitude:
- Facebook: https://www.facebook.com/scrapbookingattitude
- Twitter: http://twitter.com/Scrap_Attitude
- YouTube: http://www.youtube.com/scrapbookingattitude
If you make your own design drop me a line, Id love to see what you make!
I created this DIY project as a paid campaign with Scrapbooking Attitude and Blueprint Social, the design and opinions are my own.
Check out more DIY projects using Scrapbooking Attitude:

Love the lips. What a great motif for a makeup bag.
Thanks for the cute idea! Clever!
How fun! I love the lipstick print!
so cute! I would keep all my lipstick in this, haha!
Hee hee, such a cute little makeup bag.