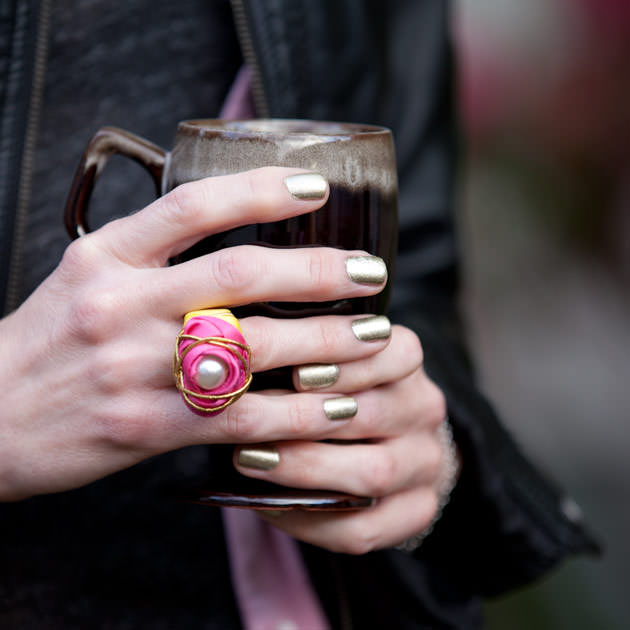
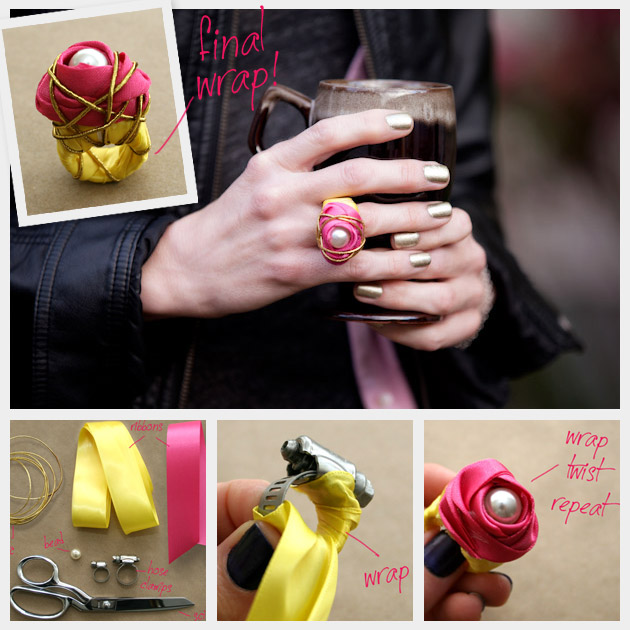
Create this Ribbon Wrapped Ring DIY using ribbon and an unexected item from the hardware store to make the base of this ring.
This Ribbon Wrapped Ring DIY will also be featured on The Daily Sequin. I was so flattered when I was contacted by Vidhya from The Daily Sequin to create a project to be featured on her blog. Be sure to check her out.
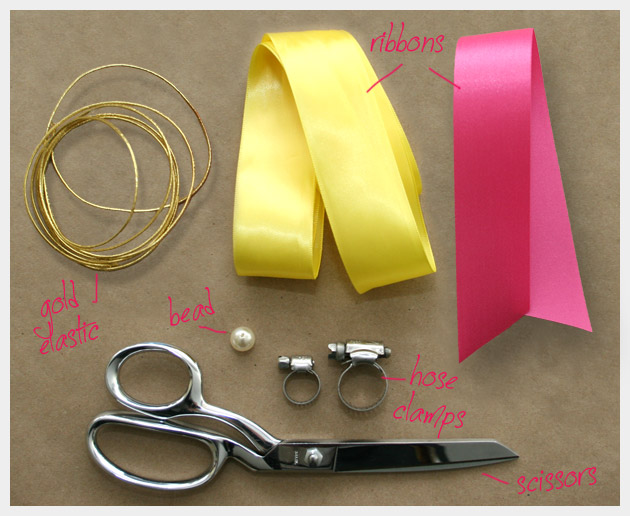
What youll need to make your Ribbon Wrapped Ring:
- 1 Hose clamp
- 2 Colors of ribbon
- Gold elastic
- 1 Large bead
- Scissors
- Hot glue
- Needle
- Thread
- Skrewdriver
Step 1
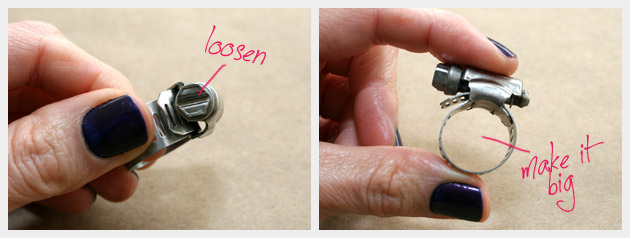
Adjust your hose clamp. You can do this by loosening the skrew at the top of the hose clamp. Youll want to make sure its very loose to start because as you wrap your ribbon and elastic it will get tighter. Its a good idea to check the size frequently as you go.
Step 2
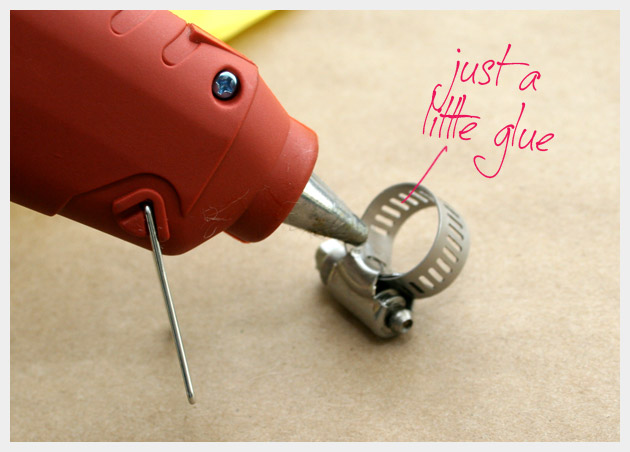
Put a small drop of hot glue on the inside underneath the top of the hose clamp and attach the end of your ribbon that you will be using for the main part of the ring.
Step 3
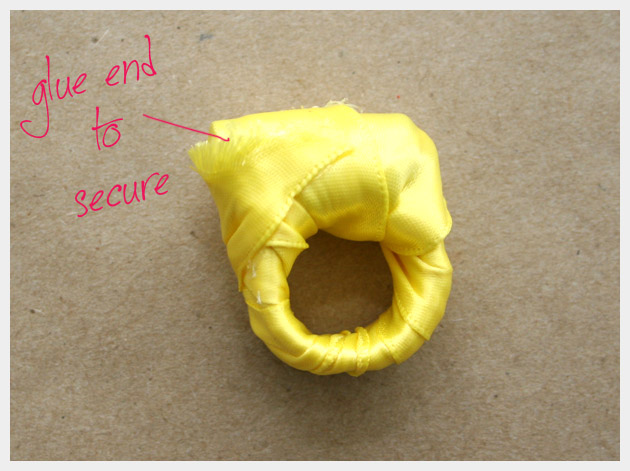
Start wrapping your ribbon around the hose clamp, pulling it snug. Before you wrap the top part of the hose clamp is a good time to check your size. Just remember that even at this point, you still want it a little loose.
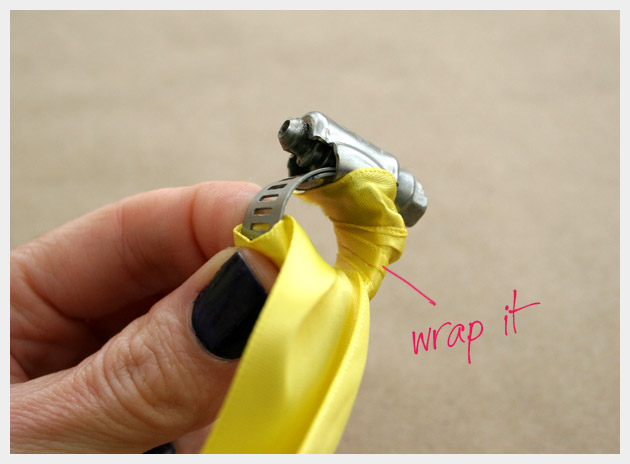
Continue wrapping the top part of the hose clamp, covering it completely. When you get to the end put a small drop of hot glue to attach the end of the ribbon.
Step 4
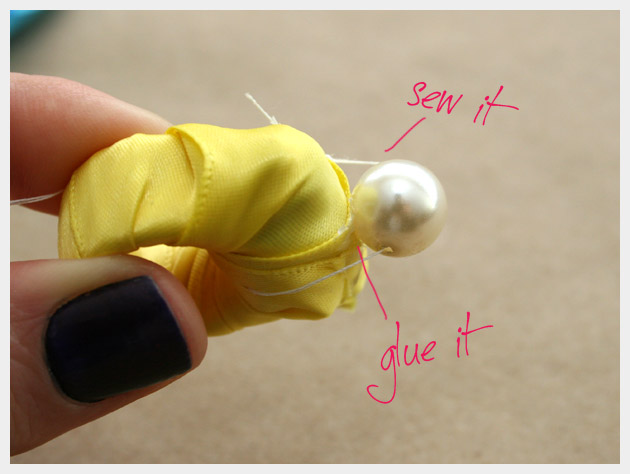
Take your large bead, needle and thread and making a big loop, go through the hole in the bead, around the top of the hose clamp, running the needle and thread through the ribbon just underneath the top of the hose clamp. Before you pull your thread tight, put a small drop of hot glue on the top of the ring to secure your large bead.
Pull your thread tight and make at least another 2 loops around to hold your bead.
Step 5
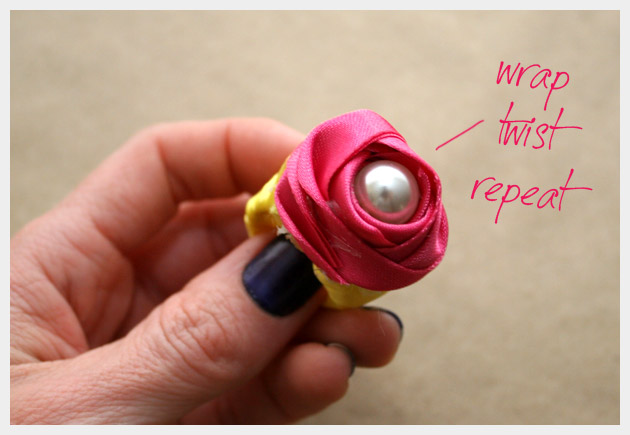
Take your 2nd ribbon color and fold it in half longways. Place a small drop of hot glue on the side of your ring and attach the end of the ribbon. Start wrapping your ribbon around the top of your ring twisting it as you go, this will give it more texture.
When you are finished secure the end of your ribbon with a small drop of hot glue.
Step 6
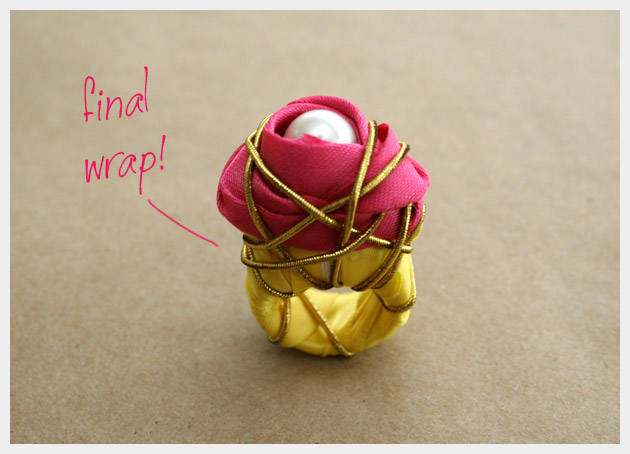
Taking your gold elastic tuck one end inside a fold in your ribbon, choose a fold that is more hidden, and secure with a small drop of hot glue.
Start wrapping your gold elastic around your ring, pull it snug but not to tight. When you are finished cut your elastic and tuck your end inside another fold in the ribbon and secure with a small drop of hot glue.
Cocktail rings are still (and always will be in my book) a must have accessory.
You definitely can never have too many, so lets go big and bold with this Ribbon Wrapped Ring, say that 10 times fast! This simple DIY tutorial will show you how to make a bold and colorful, statement ring using a hose clamp and some ribbon.
With Summer right around the corner this colorful Ribbon Wrapped ring will be an asset to any flirty dress or basic jeans. You can mix up some really bright color combinations and create a serious statement.
Go big, go bold and add a pop of color to your wardrobe. Have fun!

AMAZING! I want to try it ASAP! Thanks for sharing! :-)
Thanks Angela!
Let me know how it turns out. I’d love to see it.
xoxo
Cathy
Wonderful!!
I must try, it looks so easy!! :-)
Kisses from Italy!
Grazie!
It’s very simple, if you try it I’d love to hear how it turned out.
xoxo
Cathy
Wow, this is ingenious! Would never have known it was a hose clamp!! :-)
What an amazing and yet simple idea! Will try it very soon :)
very gooooooooood_nice
such a cute idea! well explained!
Ya lo quiero hacer, lista para ir por mi material. Gracias.
I must say, your projects are so fun and full of liveliness! One of the things that I like the most is you show every detail in your photos. Step by step. A lot of blogs don’t do this. And it is extremely helpful even with some of the simplest steps. It is greatly appreciated!
Can’t wait to see what’s next! Jen :)